Automatic Rules
Rules automate categorization to get you to a real-time month-end.
Create a new rule
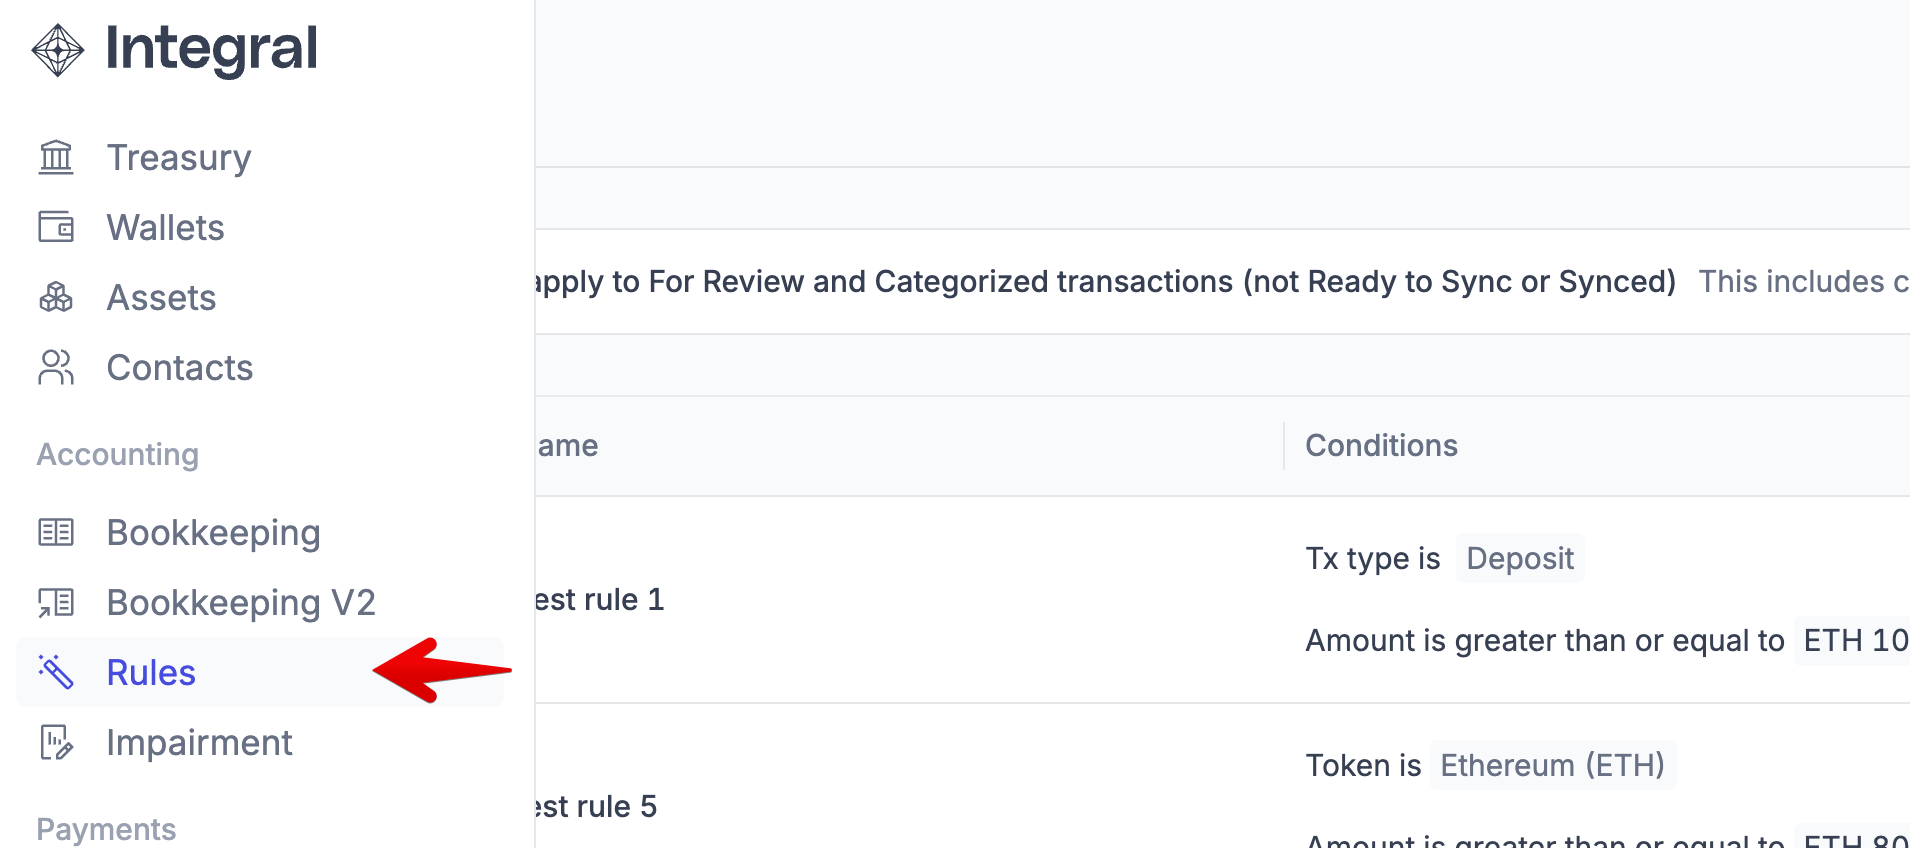
To create a new Rule, navigate to the Accounting page in the left sidebar. Find and click on the “Add Rule” button in the top right corner. Give your Rule a name that will be easy to recognize, for example: Secondary sale royalty income.
Define the rule conditions
Under Conditions, specify the transaction characteristics specific to your rule. By default, Transaction Type will already be selected. Add more conditions using the (+) widget on the right. Make sure to make these conditions as specific as possible.
For example:
Transaction Type → DepositTo → Wallet → Coinbase AccountToken → Ethereum
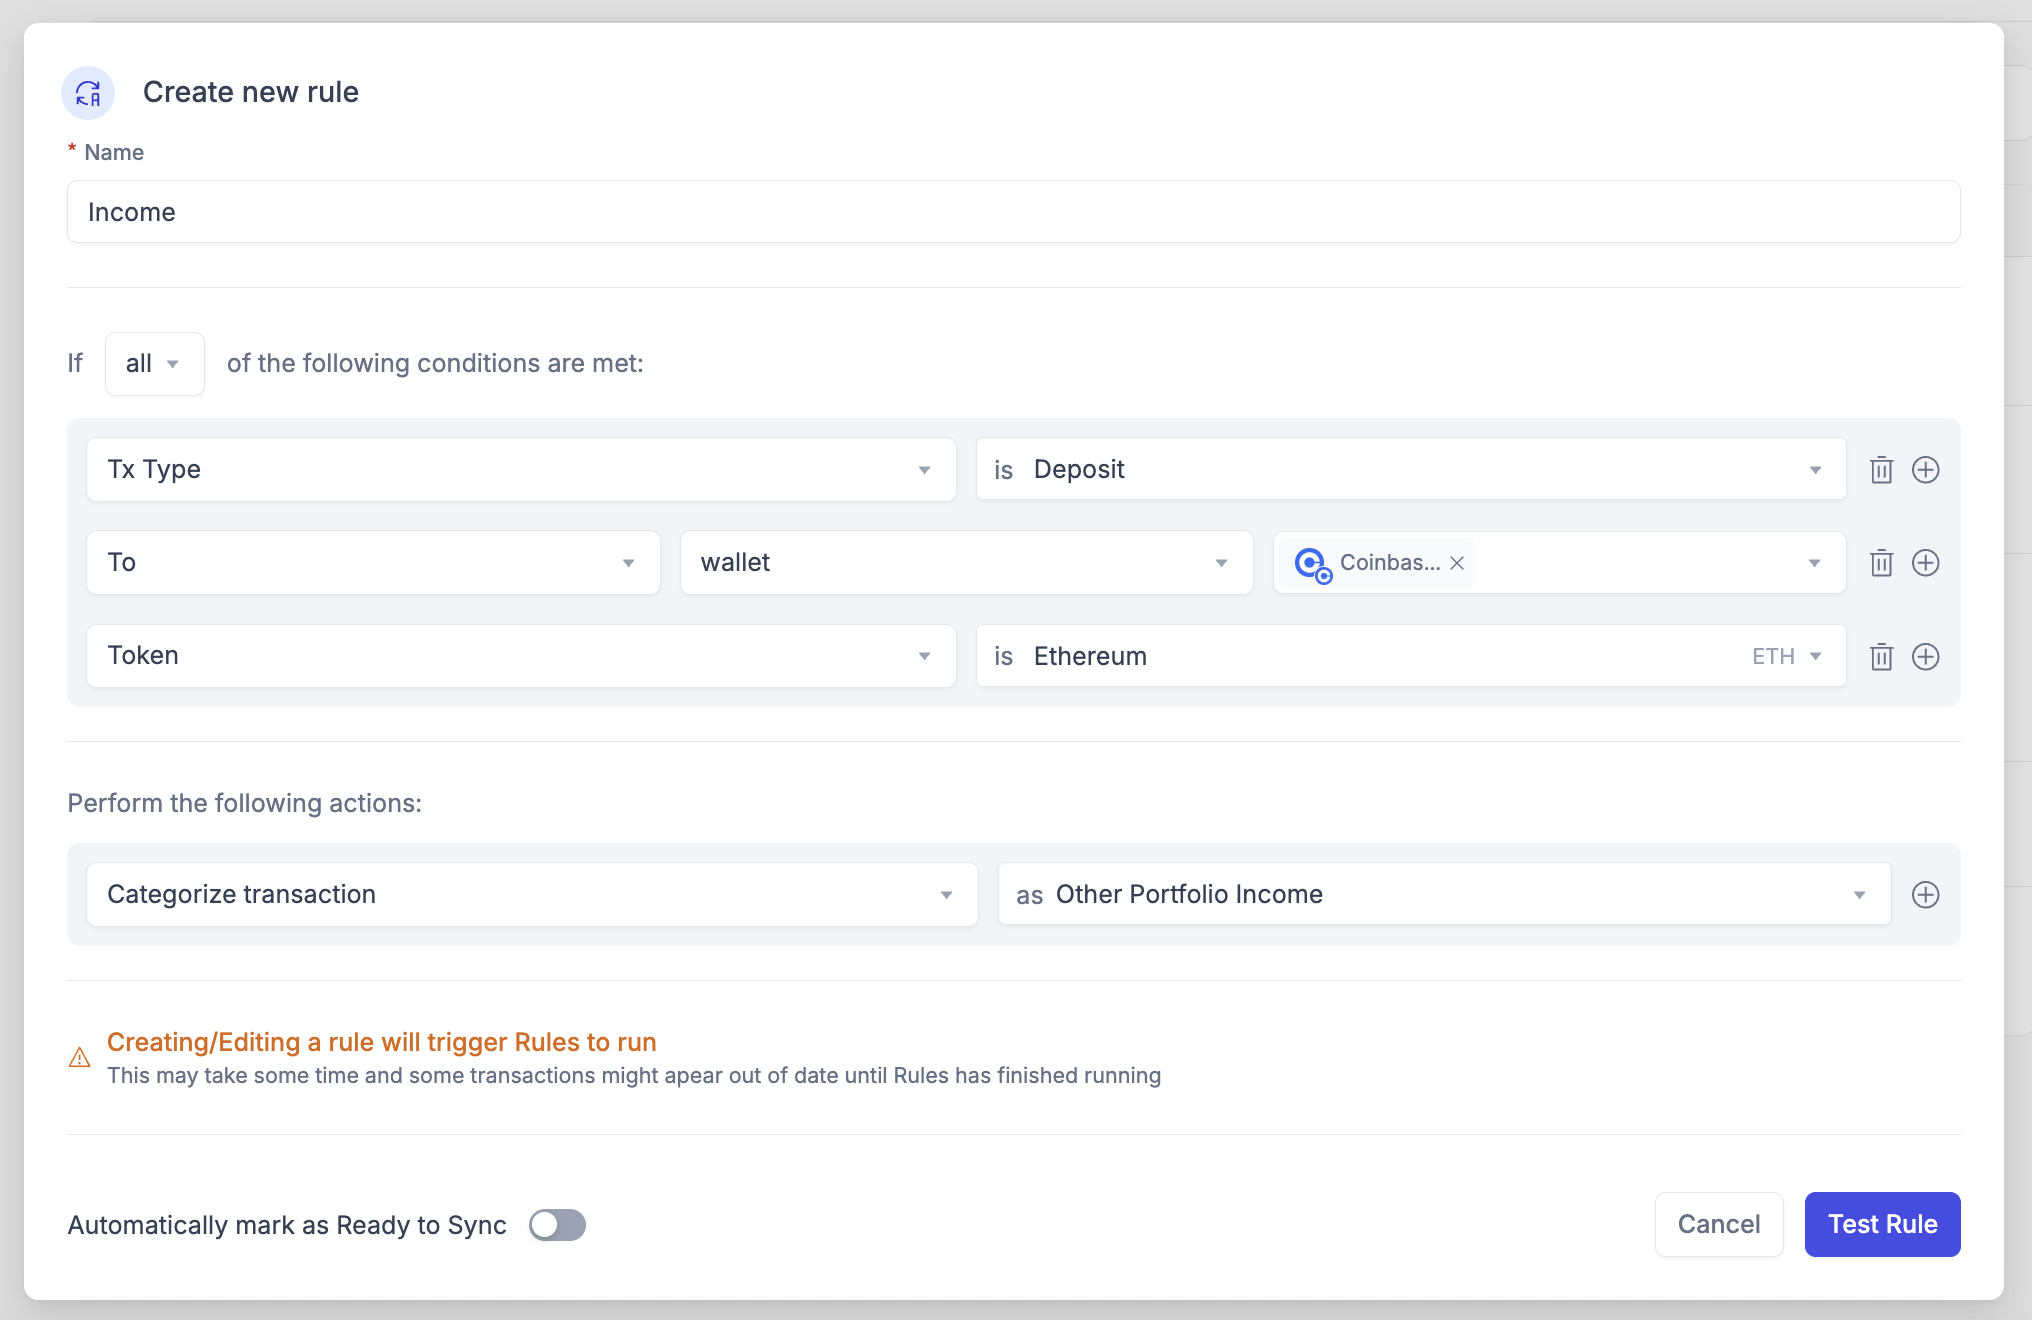
Define the rule actions
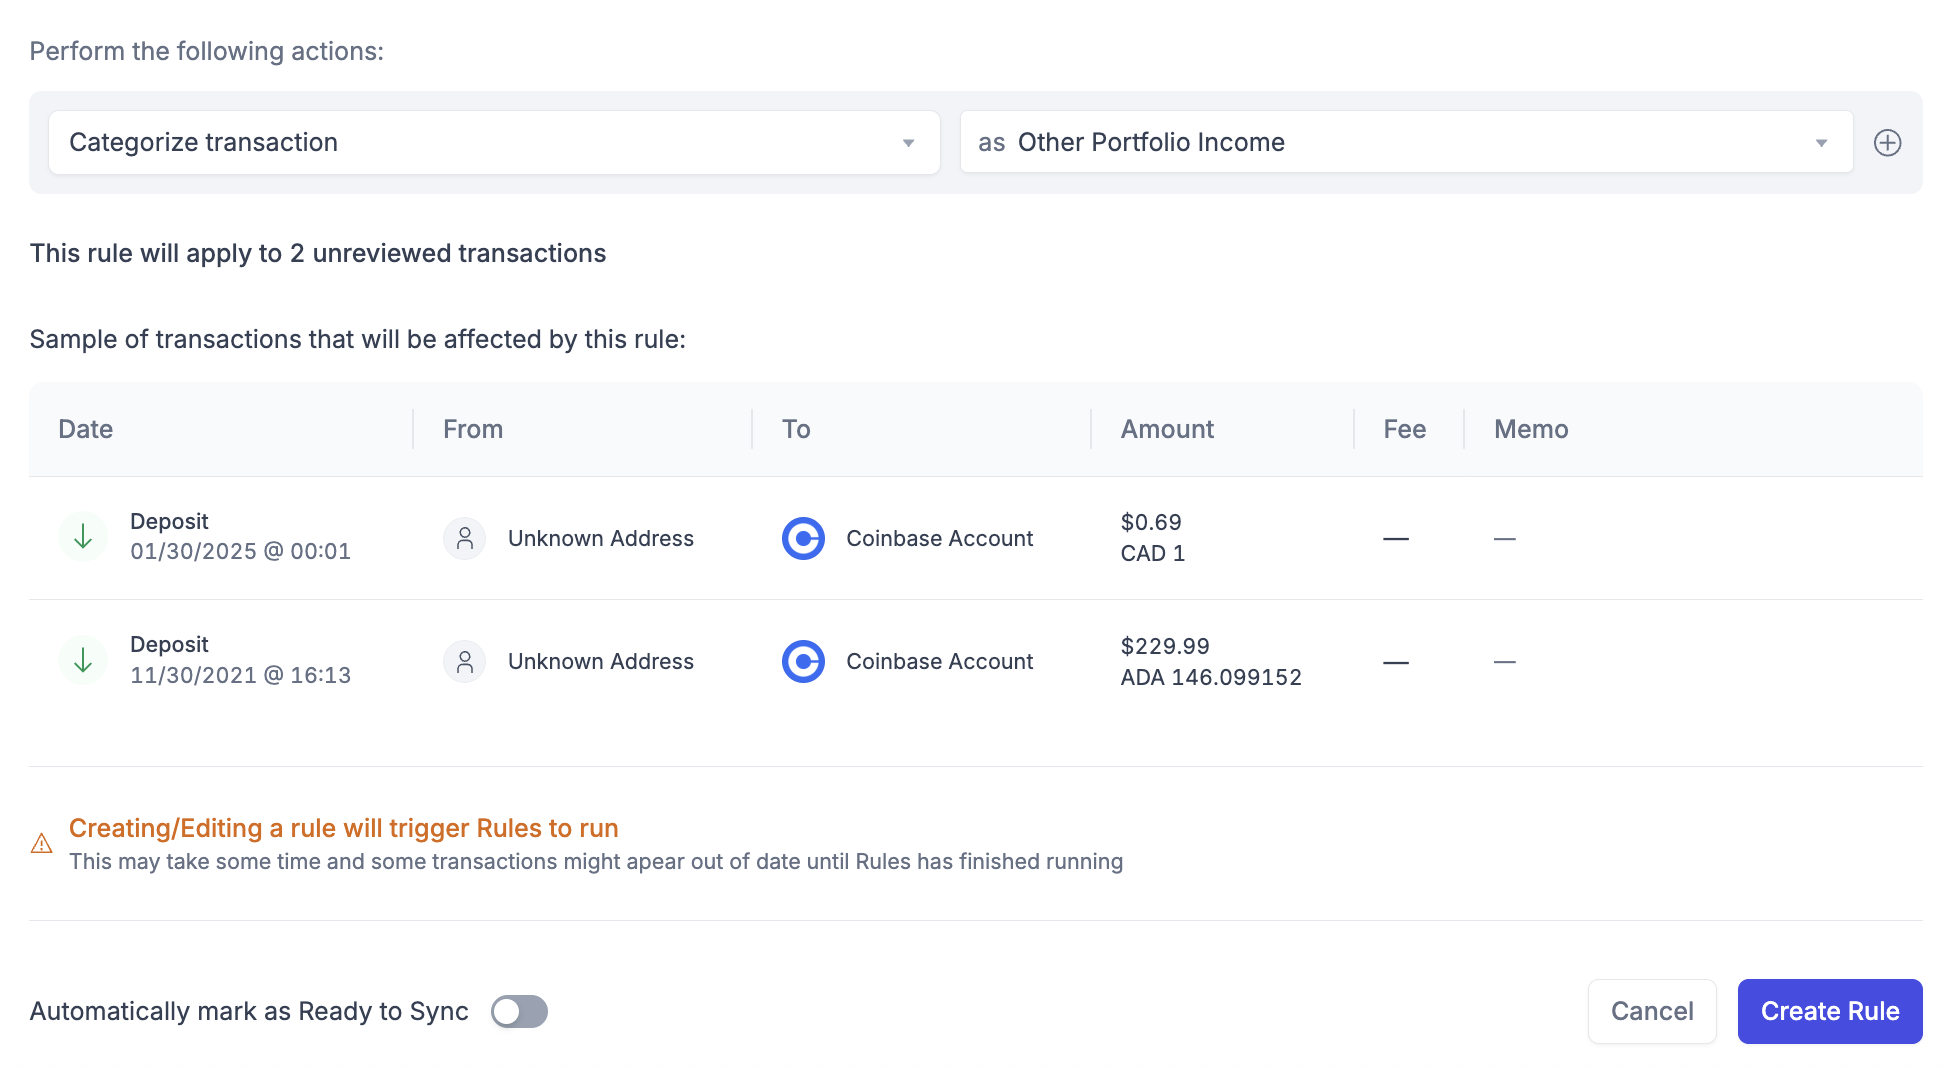
Under Actions, we identify what we want the rule to do. By default, “Categorize transaction as…” will be the default action. The dropdown will be your Chart of Accounts. In our example, the account might be Other Portfolio Income
You can optionally automatically mark all transactions affected by this rule as “Ready to Sync”, but only recommend if you have a high volume of transactions. For lower volume accounts, you can bulk select transactions to move to Ready to Sync.
Preview the transactions that will be affected
To make sure we set up our rule correctly, it’s very important to preview which transactions will be affected by the rule. When setting up a new rule, you will be prompted to Preview the rule before creating it.
Review the Preview, make sure the transactions shown are correct or adjust the rule conditions. Only a small sample size is given for the types of transactions that will be affected.
Apply the Rule
If the Preview results look good, it’s time to create the rule and apply it to your transactions!
Only transactions that have not already synced to your accounting software or marked as ‘ready to sync’ will be affected. Integral does not overwrite anything already posted to Quickbooks/Xero.
Once your rule is created, you will see it appear in the Rules page. You can edit, disable, or delete a Rule using the ⋮ icon on the right. See Manage your Rules for details.
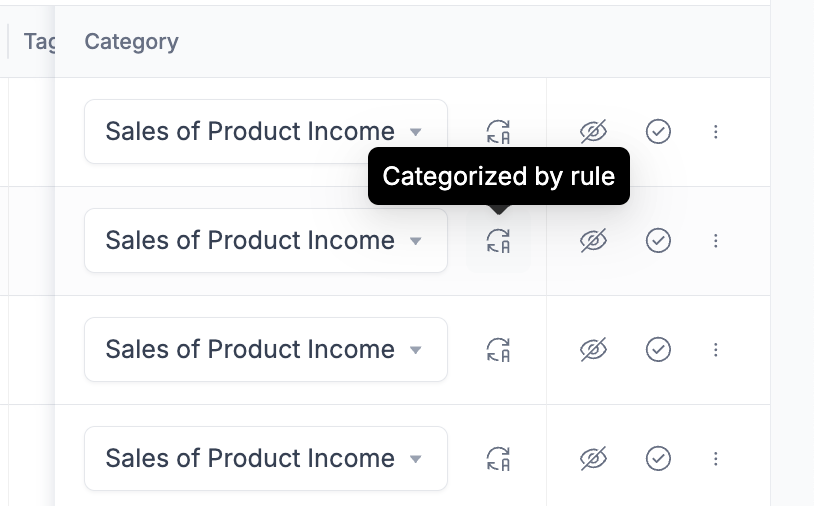
To see which transactions have been affected by the rule, go to the “Categorized” tab in the Bookkeeping page and look for the automation icon in the Category column: