NFT Royalties
Recognizing NFT revenue for companies with multiple collections is challenging. With Integral, you can automatically categorize revenue by primary sale vs secondary sale, and by collection.
To classify your NFT royalty transactions as primary and secondary income per collection, follow these three steps:
Update your Chart of Accounts with Revenue Categories
Add your NFT collections to Integral
Automate your per-collection categorization with Rules
Step 1: Update your Chart of Accounts with Revenue Categories
Let’s assume the NFT company has two collections: NFT Collection Alphabet, and NFT Collection Soup. You might want to include something like this in your Chart of Accounts:
Income
Primary Sales - Alphabet
Secondary Sales - Alphabet
Primary Sales - Soup
Secondary Sales - Soup
Of course you can set this up any way you like! This only illustrates what’s possible. Make sure you have the categories you need in your Chart of Accounts before creating your Rules.
Step 2: Add your NFT Collections to Integral
Add your NFT smart contracts to Integral as NFT Collections.
To do so, navigate to Wallets > +Add Wallet > NFT Collection. Copy-paste your NFT Collection smart contract address. It will appear under the NFT Collections tab in the Wallets page.
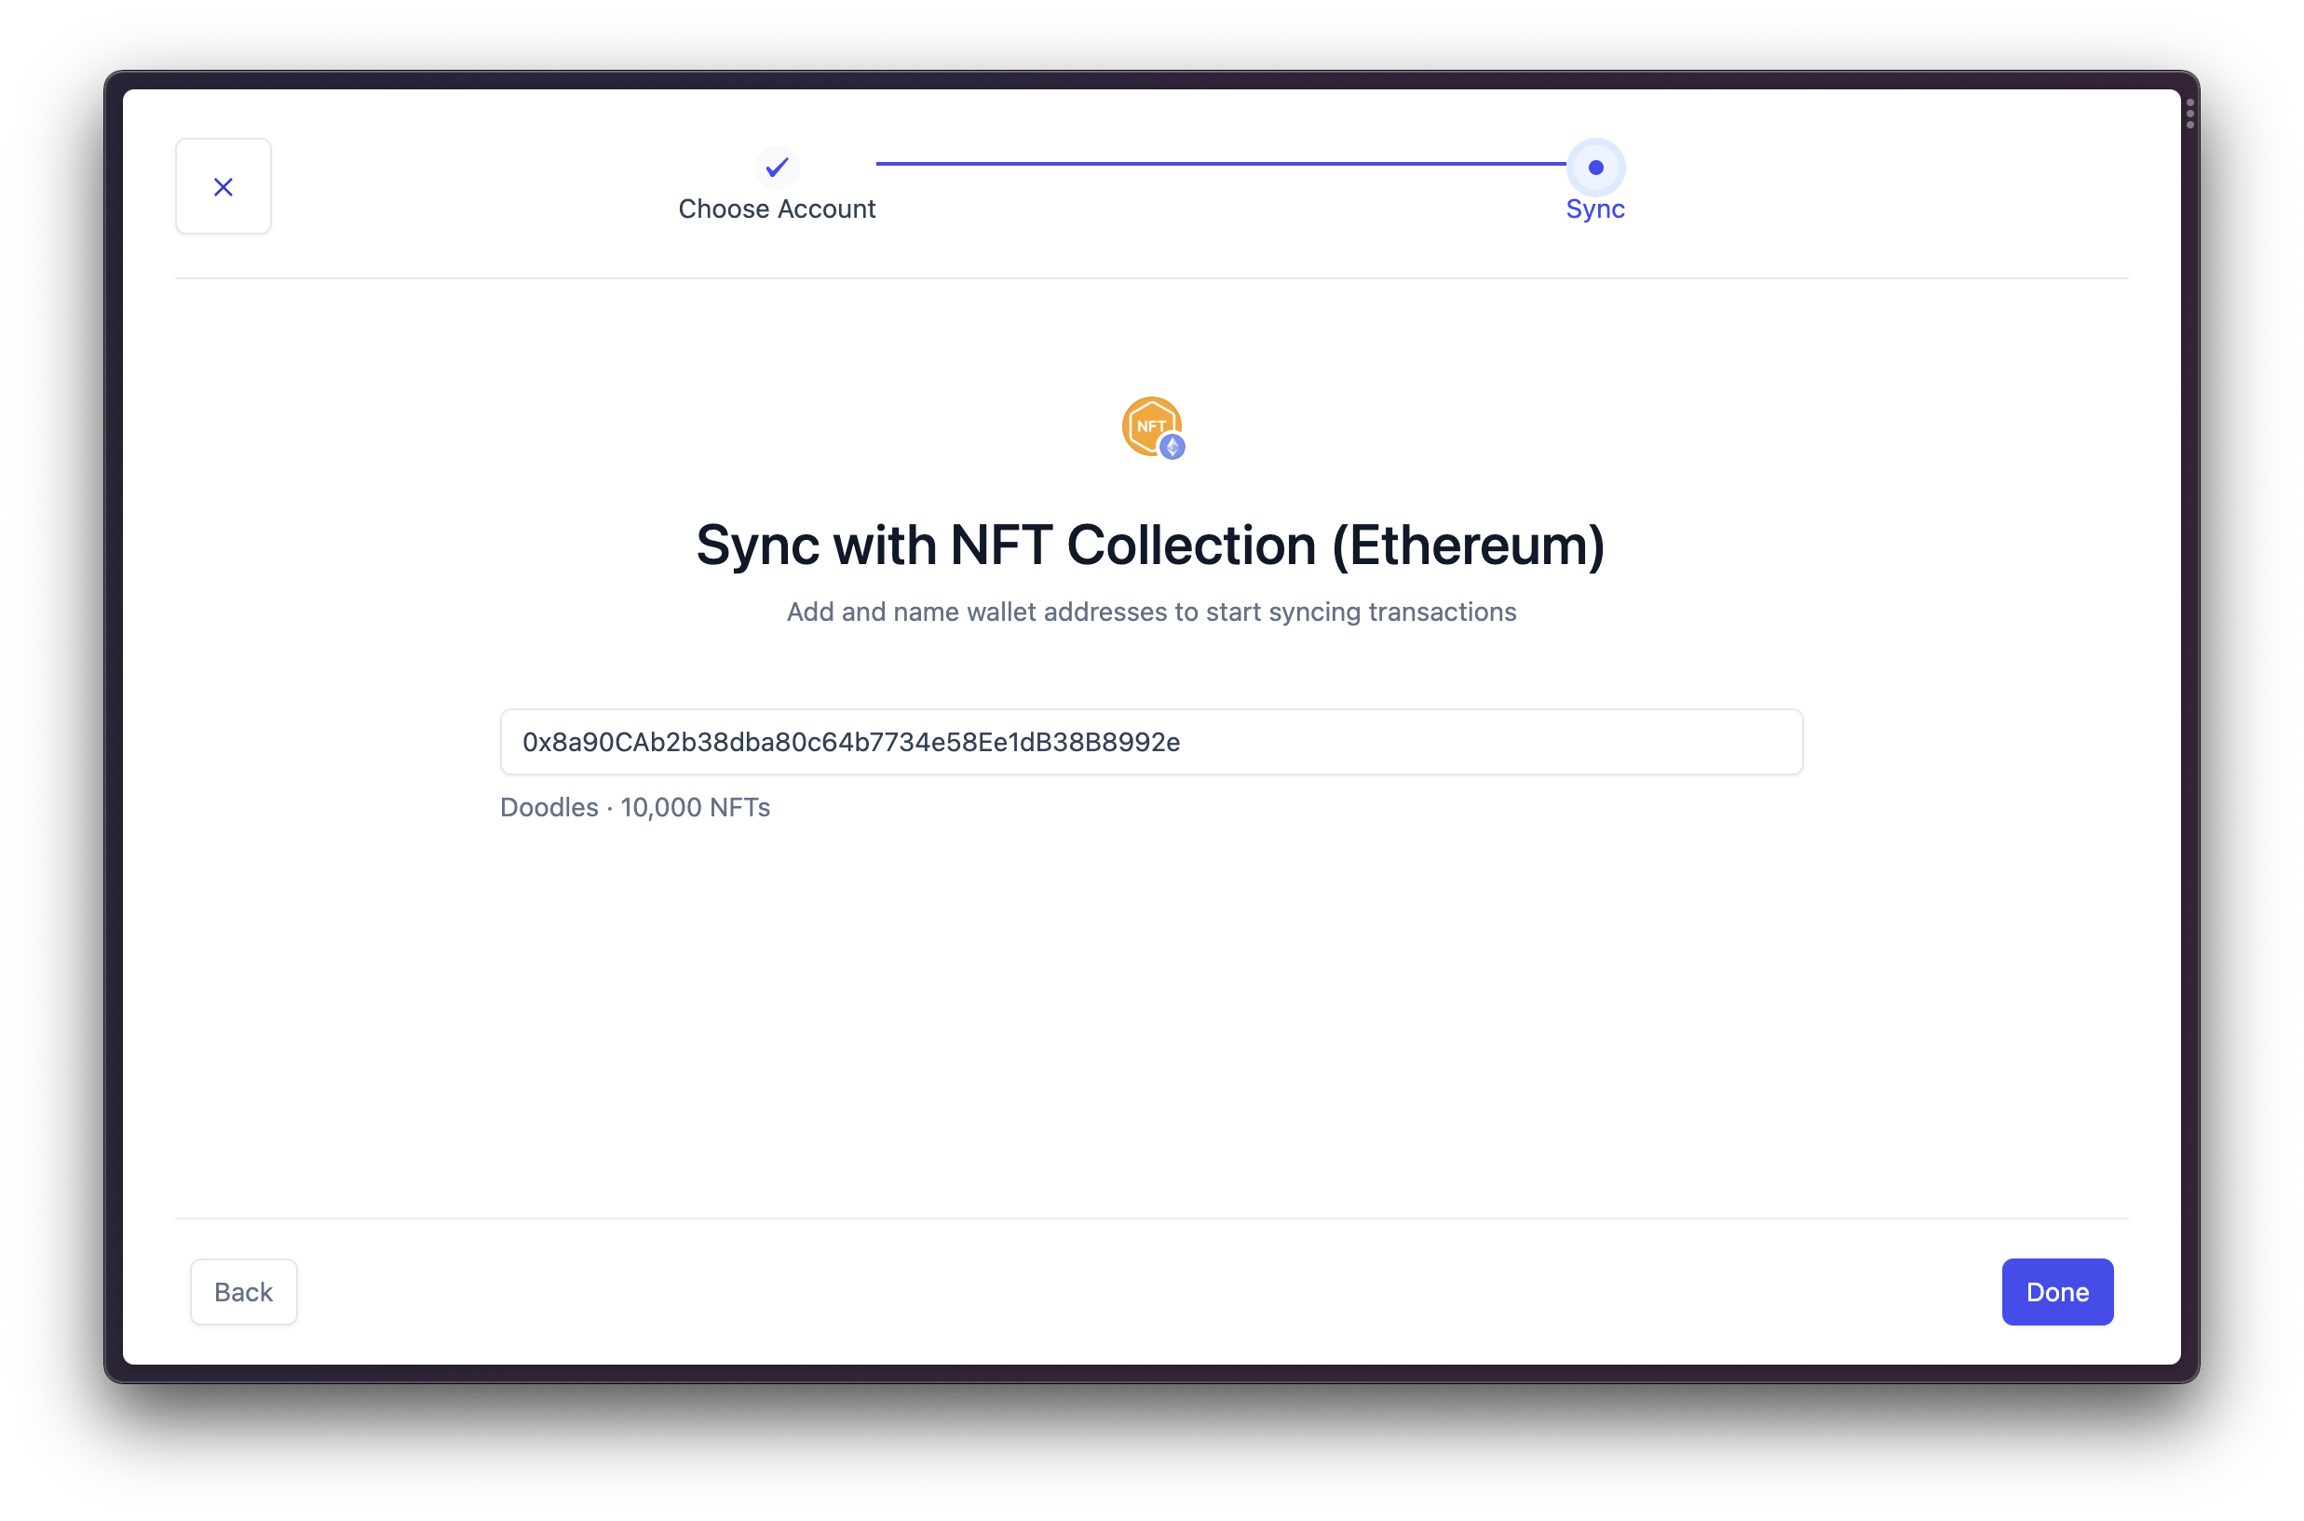
Copy-paste your NFT smart contract address into NFT Collections
Where can I find the NFT Collections smart contract address?
The easiest way is to ask the NFT team! You can find it from the company’s page on a marketplace like OpenSea, or as the Token Contract on Etherscan.
How do I know if adding the NFT smart contract worked?
#1) Check your NFT Collections in Wallets
You should see your NFT Collection show up in Wallets > NFT Collections.
#2) Check your NFT metadata in Bookkeeping
You should also see the Txn Action, NFT Collection, and Token ID show up in Bookkeeping for transactions related to minting or royalty deposits from the collection you just added. Scroll to the right in the Bookkeeping table to see it.
If you don’t see the data right away, try clicking on “More filters” and using the NFT filters to find your relevant transactions.
Step 3: Automate your categorization
Lastly, we need to create rules to automatically categorize our transactions as primary sales income and secondary sales income. We can even do it by collection and marketplace.
Navigate to Automation in the side bar.
Create a new rule and give it a representative name (example: Primary Income)
From here, add your rule conditions according to the type of rule you are looking to create. Typically you will want to include the NFT Collection as a condition, and the Transaction Action in the case of Minting/Primary Sales.
It is theoretically possible to use the “Interacted With Smart Contract” condition in Rules to categorize transactions by marketplace. However, marketplaces often change their smart contract addresses. Only use this if you are prepared to keep it up to date.
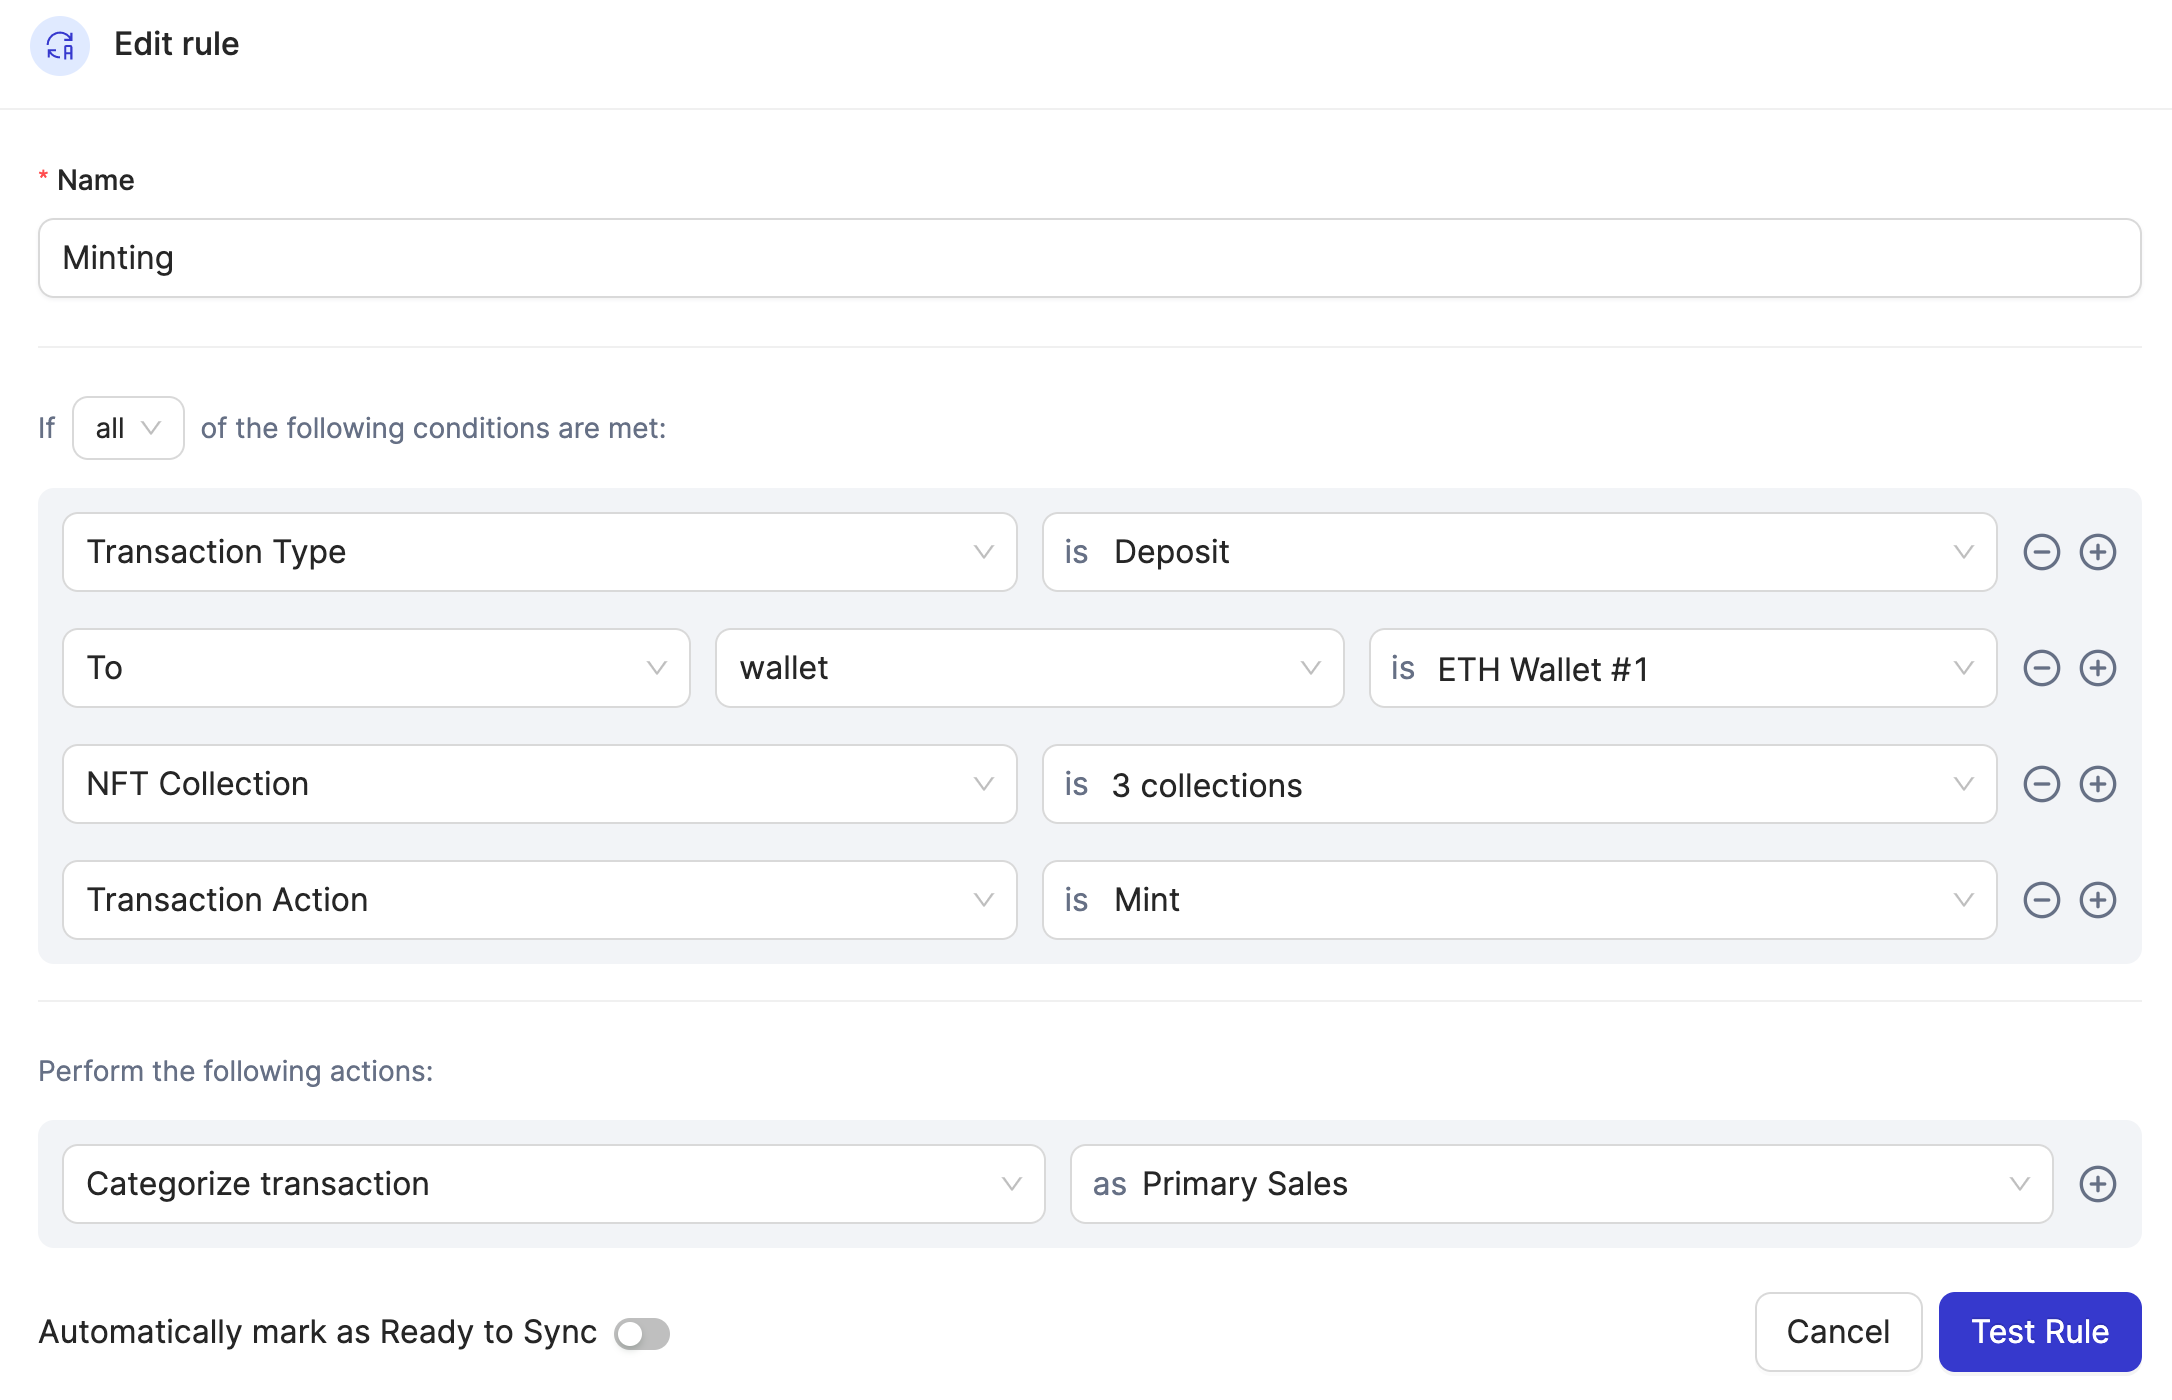
Rule Template: Primary Income per Collection
Primary Sales are identified when the “Transaction Action” is “Mint”. You can also specify a wallet and one or more NFT collections if you want to do it per collection.
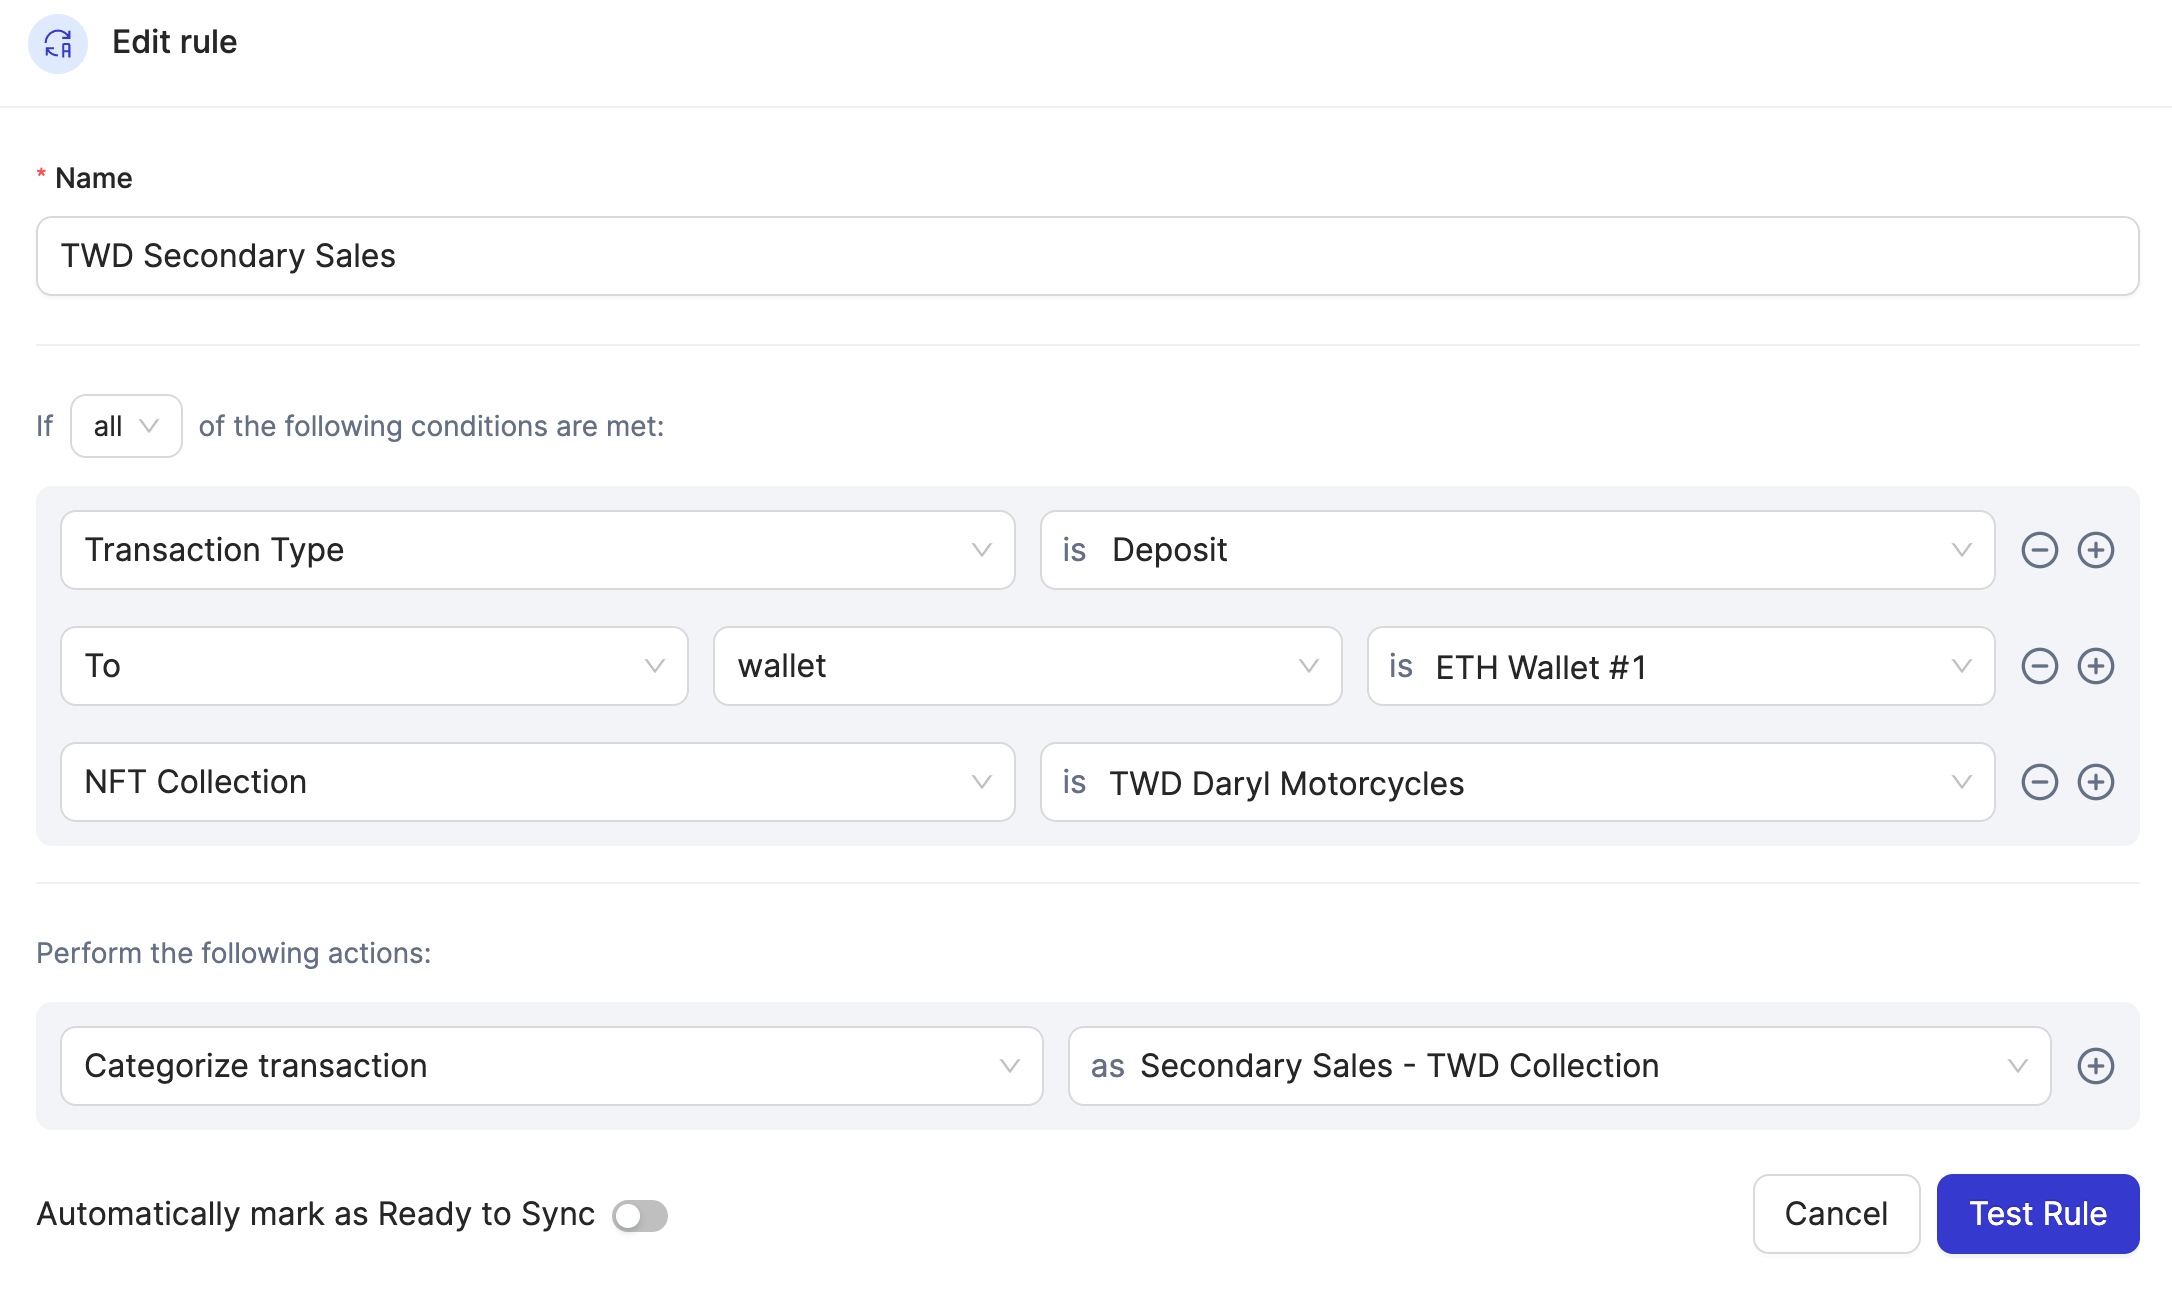
Rule Template: Secondary Income per Collection
Secondary Sales are identified wherever NFT Collection is populated, so make sure to specify the NFT collections. Secondary Sales rules should always come after minting rules.
Primary Sales rules must always be set higher priority than Secondary Sales rules. This makes sure you don’t accidentally categorize minting proceed as secondaries. 👇
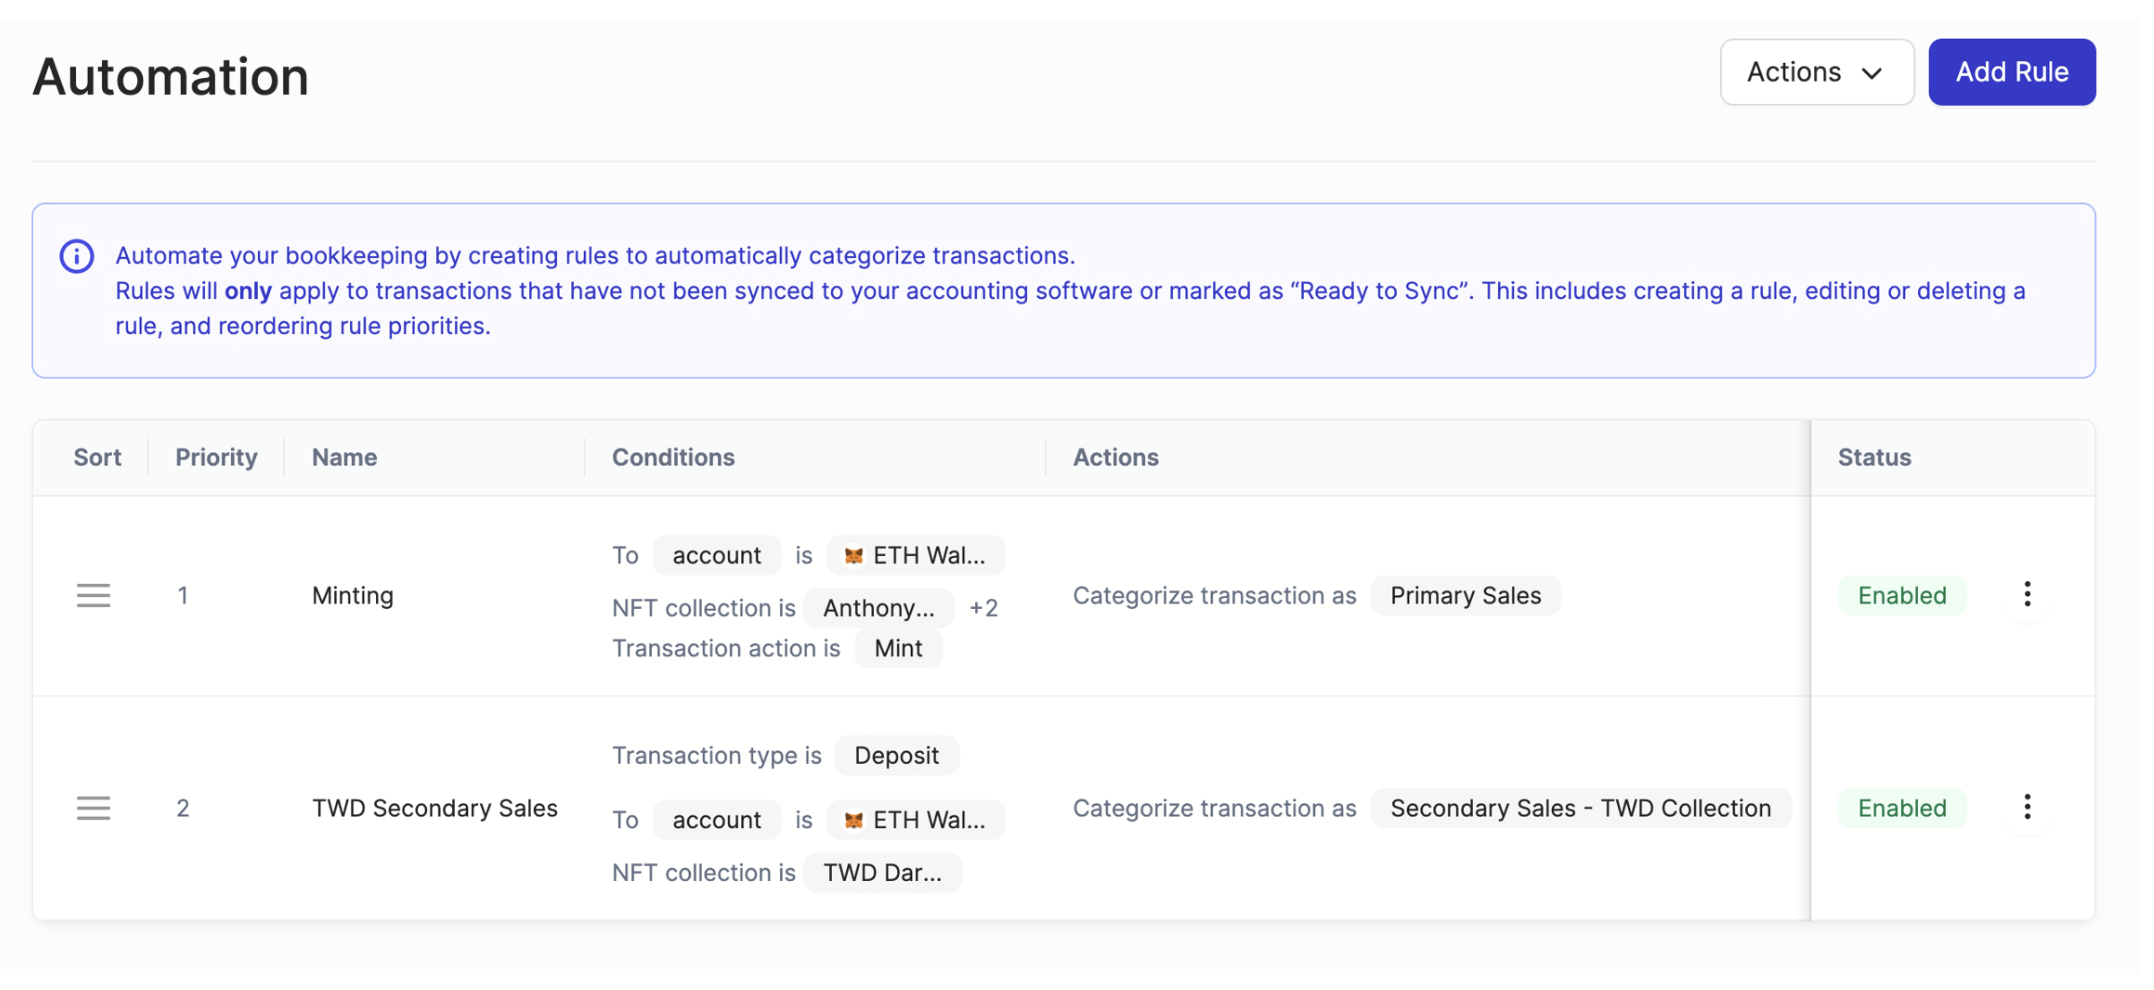
Primary sales rules should always come before secondary sales rules